Wednesday, October 31, 2012

Red Bean Bun!

Yeah, I know, I'm posting food instead of crafts.  No, you aren't linked to a wrong blog.  Some of my friends asked if I can share some of the recipes with them and after pondering for a loooooong time, I decided to do it here on my blog.  However, I am NOT a professional, so everything I post here is based on others' recipes or my own trial and error, so pardon me if I made any errors or stupid mistakes!

There is a Thai store here where I'm living which I really like to go.  It's like hunting for treasures everytime!  And this time I found this!

I have tried to make my own red bean paste but it was too troublesome and the end result was not satisfactory.  So when I saw this, I grabbed it!

Then I walked briskly over to the flour section and got these!

Finally I can try a recipe which I have bookmarked a long time ago but lack the ingredient (mostly courage) to make - red bean buns!

This recipe is from the talented Lydia from My Kitchen (with my own adaptation).

Ingredients (makes 14 buns)
7g instant dry yeast
170ml lukewarm water (make sure it's not too hot 'cos it'll kill the yeast)
½ tsp lemon juice
280 low-protein flour
100 wheat starch
70g icing sugar (I reduced the sugar a little)
30g vegetable oil
10g baking powder

Filling:
35g red bean paste, divided and shaped into 14 balls (I think I'll make them bigger next time, around 40g per ball)

Methods:
1.  Sift together flours and icing sugar in a large mixing bowl and make a well in the middle.
2.  Mix lukewarm water, lemon juice and yeast well.  Pour the mixture into the well.  Gently stir the water to bring together the flour mixture.
3.  Add in oil and knead till a soft dough is formed. It should be smooth on the surface.


4.  Cover the dough with a damp cloth and let it rise for 30 mins or until it is double in size.  I had to turn my oven on and let it proof inside because it's too cold now - it's winter! 


5.  Dissolve baking powder in cold water, sprinkle over dough and knead until well combined.  Make sure you dissolve the baking powder thoroughly, otherwise you'll get yellow spots on your buns.  Divide dough into 14 equal portions. 
6.  To make bun, flatten the dough with a rolling pin to make a circle.  The place the filling in the middle, wrap and pinch the dough to seal it.  Cut out parchment paper into squares and place the bun on them.  (I ran out of parchment paper, so I just put them in cupcake paper.) You can choose to have the sealed side facing up or down.  My bun wrapping skill sucks, so I place most of them facing down and they still look ugly... =.="

7.  Arrange buns into a steamer, leave some gaps between the buns.  Spray water mist over buns and steam in a preheated steamer on high heat for 10 mins.  After wrapping all my buns, I realised that I don't own a 
steamer! (How did that happen?!) So I steam them in my tiny 1 liter rice cooker, 4 buns at a time.... =.=" 

Remove buns from steamer and cool them on a rack to prevent soggy bottom.
8.  Then make yourself some of your favorite tea/coffee and enjoy! 


Ok, I need to improve my bun wrapping skill... the red bean paste shouldn't look like a mustache .. but it tastes almost like the ones I get back home!

Wednesday, October 10, 2012

Multi Purpose I-Cord

No, it's not the latest product from Apple.  It's a tube which is knitted in round and used in many different ways in the knitted/crochet projects.

Purl Bee has a clear tutorial on how to knit an I-Cord. Check it out here!

I guess my Pinterest-addiction is no longer a secret by now.  There's so many creative projects I just don't know which to start!

This bracelet was an inspiration from Pinterest as well!

Using the super easy I- Cord!  And this is the tutorial on how to tie the woggle knot.

Simple and pretty! 

I've also made a necklace using the i-cord and a pendant!


What would you make using the i-cord? Go on, get creative!

Monday, October 1, 2012

Arleen

I finished 2 tops recently.  The pattern's name is Arleen and it's free on Ravelry.

One for my princess.


 And the other for me!

And I got these beautiful buttons from Lyanwood on Etsy. 


I'm getting more confident in knitting tops! ^.^

Sunday, September 30, 2012

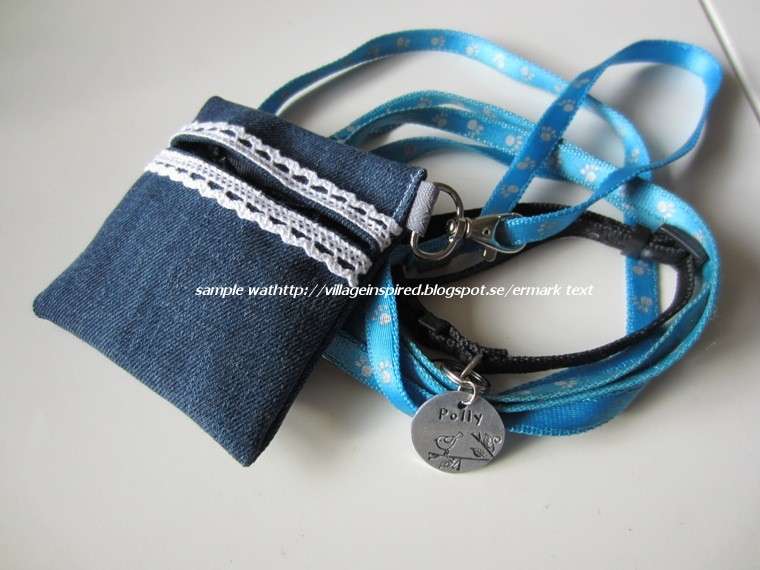
Polly's Poop Bag

We are wearing jeans out at super speed in this family.  They kids wear jeans everyday to school, so it is no wonder that their jeans get worn out within months!  Hence, I always have jeans with holes stored somewhere, until I find other ways to use them.

We got a puppy this summer.  She has brought a lot of joy (and frustration!!) to our lives and the older kids have gotten more exercise because it is their duty to walk her.  And I'm starting to find poop bags in the washing machine because the kids carry them in their pockets. Finally! A way to recycle my old jeans!!

This is the result!
  
It works with the flexi-leash, I just need to put a ring on the leash.

Works great with the other leash as well!  Success!!

And yes, her name is Polly!

Saturday, August 25, 2012

Crochet Hair Scrunchie

I'm so addicted to Pinterest.... repining everything and telling myself that I'm gonna try this and that one day, but that "one day" seldom comes.... : p

The tutorial can be found here http://lovestitches.blogspot.se/2012/03/tutorial-crochet-scrunchie.html for those who are interested to give it a try.

This is my version with added beads.  And the best part is that it can be done within an hour! (or less if you're a fast crocheter and you do not have dirty toddler to chase around and clean...)


I'm now gonna rummage my daughter's room for more elastic bands! 

Monday, August 20, 2012

Winding a Center-Pull Ball of Yarn by Hand!

I'm sure for those of you who knit or crochet, you must have experienced this frustration before.  After spending days on a project, you realized that you need to take it apart and re-do it, or you have lumps of left over yarns from previous projects and they're just all tangled up and lumpy together with the rest of their left over friends....

You know what? I found the great solution to these!  Thanks to the kind people at Lion Brand, organizing yarns is no longer a headache! (sorry this sounds so "commercial"! : p) Not only that, now you can wind your own center-pull yarn ball every time you get your new yarn, the ball will not roll or tumble around so much coz it's pulled from the center!

Go on now! Click on the link and learn this new trick!

http://blog.lionbrand.com/2012/07/13/keep-yarn-organized-learn-how-to-wind-a-center-pull-ball-by-hand/

After winding my first one, I realised that this could be made easier with a slight twist or two.

Make a slip knot and hook it onto a fairly good size crochet needle. (I use a 4mm one.)

Then I held the crochet needle together with another good size knitting needle (I use a 5mm.)...

And then I wrap the yarn around both needles.

Making criss cross with the yarn around both needles now and then....

Imagine you're wrapping the yarn around a ball...

Keep wrapping your yarn, put on sometime good on tv or listen to the radio... However, doing this and trying to chase your 2 year-old to stuff dinner down his throat is not such a good idea... =.="

Once your yarn is almost done, tuck the remaining tail (the one which you have been using to wrap around) secure under a few rounds of yarn.  Then I pull out the knitting needle first.  Then I pull out the crochet needle with the slip knot carefully, making sure that I don't get other yarns on my way out.  

And I don't pull the yarn (with the slip knot) all the way out, I left the beginning end still tuck inside the ball, so when I need to use it I just need to pull it out.

Alternatively, you can cut a piece of straw so it fits your crochet needle, like this.


If you use the straw then there is no need to use the knitting needle, you can start wrapping away with the crochet needle in the straw and pulling the slip knot over will be a breeze later!

There you have it! Easy isn't it? Now bring out all your left over yarns and happy wrapping!


Wednesday, August 8, 2012

Anniversary Gift

This year is our 7th wedding anniversary and as always I was wrecking my brain regarding what present to get for hubby.  Being a poor thrifty housewife, I can't afford the latest or coolest technical gadgets which hubby is interested in, so I'd have to kill some brain cells to come up with something that is not so expensive and creative.  Being a Pinterest-addict, I've seen many creative ideas and this is what I made!


I cut out the map of Singapore and pin the place where we first met with a glittery heart.  I wanted to print it out on black paper with gold font but I guess my color cartridge in the printer was in holiday mood and wasn't working like it should, so I had to settle for the second best.  It turned out pretty alright anyway!